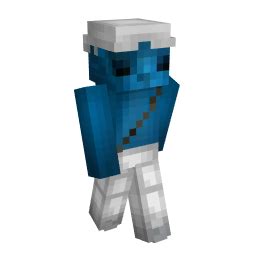
A Complete Guide to Crafting the Perfect Minecraft Smurf Cat Skin
Are you ready to unleash your inner artist and create a unique Minecraft skin? This guide dives deep into crafting the perfect Smurf-themed cat skin, combining the adorable charm of a feline with the iconic blue hue of the Smurfs. We’ll walk you through the process step-by-step, ensuring you achieve a result that's both visually appealing and true to the Smurf aesthetic.
Understanding the Basics of Minecraft Skin Creation
Before we begin our Smurf cat adventure, let's quickly cover the fundamental elements of a Minecraft skin. A skin is essentially a 64x64 pixel image, split into various sections that represent different parts of your character. These sections include the head, torso, arms, and legs. Understanding these sections is crucial for accurately placing elements within your design.
Many free online skin editors exist that allow you to manipulate the pixels directly. These editors typically provide a grid view and a palette of colors to make the process easier. Experimentation is key!
Designing Your Smurf Cat Skin: A Step-by-Step Guide
1. Base Color & Overall Shape:
-
The Foundation: Start by filling in the base skin with a vibrant Smurf blue. This sets the primary color scheme for your cat. Ensure the color is consistent across all sections.
-
Cat Silhouette: Carefully shape your cat's body using the blue base. Pay attention to the overall posture and form, aiming for a cute and playful pose.
2. Adding Details & Features:
-
Facial Features: Using a slightly lighter shade of blue or even white, add the cat's facial features. Think carefully about the eyes – big, round eyes will enhance the cuteness factor. A small, cute nose and whiskers are also essential.
-
Ears: Create triangular ears at the top of the head, ensuring they are appropriately sized and positioned for a balanced look.
-
Tail: A long, bushy tail adds to the character’s charm. Ensure it flows naturally from the cat’s body.
3. Refining the Details:
-
Texture & Shading: Adding subtle shading and highlights will add significant depth and realism to your skin. Experiment with darker shades of blue to create shadows and lighter shades for highlights.
-
Optional Accessories: Consider adding optional accessories like a little hat or a small backpack to further personalize your Smurf cat skin.
4. Smurf-Specific Touches:
-
Smurf-like White Patches: You might want to incorporate small, strategically placed white patches reminiscent of Smurf clothing or faces. This subtly links your cat to the Smurf universe.
-
Creative Variations: Don't be afraid to experiment! You can change the eye color, add more significant white patches, or even incorporate elements from specific Smurfs.
Testing and Refining Your Skin
Once you’ve completed your design, test it out in-game to see how it looks. This is the perfect opportunity to spot any imperfections or areas needing refinement. You might need to make adjustments to colors, shapes, or even reposition elements for a better in-game appearance.
Sharing Your Creation
After perfecting your Smurf cat skin, share it with the Minecraft community! Many online platforms allow users to upload and share their creations, enabling you to show off your hard work and inspire others.
This guide serves as a comprehensive blueprint for creating your own unique Smurf cat Minecraft skin. Remember, the key is creativity and attention to detail. Experiment with different variations and embrace your artistic vision to produce a truly memorable character.